
Content
- Introduction: Kubernetes Autoscaling Example
- Why Does Kubernetes Autoscaling Example Matter?
- Types of Kubernetes Autoscaling (Quick Overview)
- What to Know Before Trying Kubernetes Autoscaling
- Step1: Create a Sample Deployment
- Step 2: Create a Kubernetes Service to Expose the Deployment
- Step 3: Create the Horizontal Pod Autoscaler (HPA)
- Step 4: Simulate Load to Trigger the Autoscaler
- Step 5: Monitor the Kubernetes Autoscaling Example
- Step 6: Clean Up After Testing the Kubernetes Autoscaling Example
- Bonus Tips for Real-World Kubernetes Autoscaling Example
- Fixing Common Kubernetes Autoscaling Issues:
- Beyond This Kubernetes Autoscaling Example?
- Conclusion: Kubernetes Autoscaling Example
- FAQs:
Introduction: Kubernetes Autoscaling Example
If you’re looking for a hands-on Kubernetes autoscaling example that’s easy to understand and try on your own, you’re in the right place. Whether you’re a developer, a cloud engineer, or just curious about how Kubernetes autoscaling works, this guide will walk you through it with clear steps, plenty of transitions, and a conversational tone.
Why Does Kubernetes Autoscaling Example Matter?
Before we dive into the example, let’s pause to answer a common question: what exactly is Kubernetes autoscaling?
To put it simply, it enables your applications to automatically scale up or down — in other words, it adds or removes pods — based on the current workload. Pretty cool, right?
You might be thinking, what difference does this make for me? Well, here’s the thing:
- Whenever your app starts getting more traffic, Kubernetes automatically spins up additional pods to handle the load.
- If traffic goes down, it automatically removes unnecessary pods, optimizing resource usage.
In this way, you not only improve performance but also cut down on costs — and the best part? You don’t have to lift a finger
Types of Kubernetes Autoscaling (Quick Overview)
Although we’ll focus on a basic autoscaling example, it’s good to know there are three main types in Kubernetes. Each one serves a different purpose.
Let’s break them down:
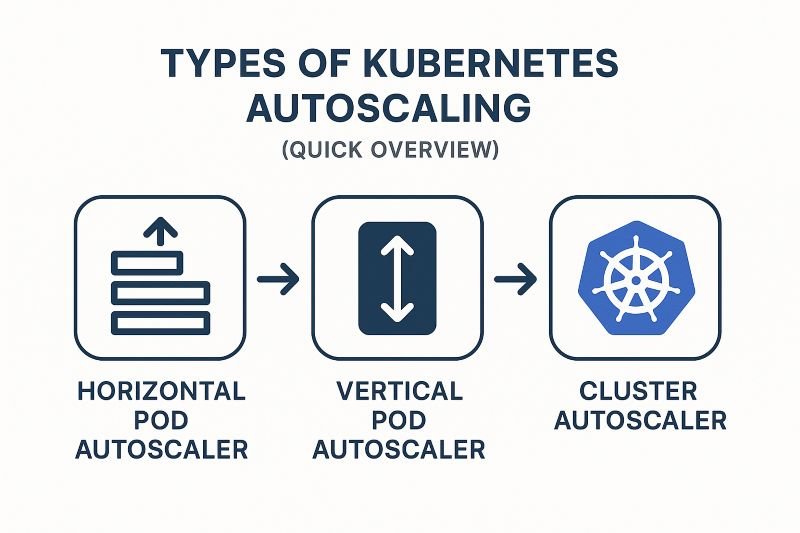
- First, we have the Horizontal Pod Autoscaler (HPA).
It adds or removes pods based on resource usage like CPU or memory. - Next, there’s the Vertical Pod Autoscaler (VPA).
Each pod’s CPU and memory usage is adjusted in real time according to requirements. - Finally, we have the Cluster Autoscaler.
It adds or removes entire nodes in the cluster depending on traffic or load.
Now that we’ve covered the basics, let’s move on to the main focus of this guide.
What to Know Before Trying Kubernetes Autoscaling
Before You Start: What You’ll Need
- First, you’ll need a running Kubernetes cluster. You can use Minikube, Kind, EKS, or even GKE.
- Next, Ensure that
kubectlis both installed and configured to communicate with your cluster. - Finally, don’t forget to install the
metrics-server. It’s required—autoscaling won’t work without it.
To install metrics-server, run:
kubectl apply -f https://github.com/kubernetes-sigs/metrics-server/releases/latest/download/components.yaml
To confirm it’s running properly:
kubectl get deployment metrics-server -n kube-system
If the output shows AVAILABLE, you’re ready to go.
Step1: Create a Sample Deployment
Here’s where the action begins. First, let’s deploy a simple Nginx server to demonstrate autoscaling.
Save the following YAML as nginx-deployment.yaml:
apiVersion: apps/v1
kind: Deployment
metadata:
  name: nginx-deployment
spec:
  replicas: 1
  selector:
    matchLabels:
      app: nginx
  template:
    metadata:
      labels:
        app: nginx
    spec:
      containers:
      - name: nginx
        image: nginx
        ports:
        - containerPort: 80
        resources:
          requests:
            cpu: 100m
          limits:
            cpu: 200m
Then, apply it with:
kubectl apply -f nginx-deployment.yaml
As you can see, this setup keeps things simple, just what we need for our Kubernetes autoscaling example.
Step 2: Create a Kubernetes Service to Expose the Deployment
Next up, we need to expose the deployment inside the cluster.
kubectl expose deployment nginx-deployment --port=80 --target-port=80 --name=nginx-service
This creates a ClusterIP service, allowing internal pods to access Nginx.
Step 3: Create the Horizontal Pod Autoscaler (HPA)
Now, the fun part! Let’s set up autoscaling.
kubectl autoscale deployment nginx-deployment --cpu-percent=50 --min=1 --max=5
Here’s what this does:
- It tells Kubernetes to maintain CPU usage around 50%.
- If usage exceeds 50%, it can scale up to 5 pods.
- If the load goes down, the deployment will return to just one pod.
Pretty neat, right?
Step 4: Simulate Load to Trigger the Autoscaler
You might be thinking, “How do I actually see autoscaling in action?”
Good question! Let’s simulate load.
kubectl run -i --tty load-generator --image=busybox /bin/sh
Once inside, run:
while true; do wget -q -O- http://nginx-service; done
Let that run for a few minutes. Increased load will cause the HPA to scale up by adding more pods. You’ll notice the magic happening.
Step 5: Monitor the Kubernetes Autoscaling Example
Now, let’s check the autoscaler:
kubectl get hpa
You’ll see output similar to:
NAME               REFERENCE                     TARGETS         MINPODS   MAXPODS   REPLICAS
nginx-deployment   Deployment/nginx-deployment   70%/50%         1         5         3
In this case, the target was 50%, but usage is at 70%, so Kubernetes scaled to 3 pods. That’s autoscaling in action!
You can also run:
kubectl get pods
You’ll see the pod count increase automatically—no manual work needed.
Step 6: Clean Up After Testing the Kubernetes Autoscaling Example
Once you’re done playing around, be sure to clean up:
1. kubectl delete deployment nginx-deployment
2. kubectl delete svc nginx-service
3. kubectl delete hpa nginx-deployment
4. kubectl delete pod load-generator
This keeps your cluster tidy and avoids unnecessary resource usage.
Bonus Tips for Real-World Kubernetes Autoscaling Example
Let’s say you loved this Kubernetes autoscaling example and now you’re thinking about using it in production—great! But before you dive in, here are a few tips to help you succeed:
- First, set accurate CPU/Memory limits: Without these, autoscaling simply won’t work. So make sure every deployment has them defined.
- Next, monitor with Prometheus: Basic metrics are helpful, but Prometheus gives you deeper insights. You can observe how your app responds when it’s under load.
- Also, add Cluster Autoscaler: Pod autoscaling is useful, but what if your cluster runs out of nodes? That’s where Cluster Autoscaler helps—it scales the nodes too.
- Then, don’t overprovision resources: It might seem safer to give more than needed, but it actually limits autoscaling. Instead, trust Kubernetes to scale things properly.
- Finally, tune your thresholds: Start with a CPU target of 50–60%. Then, observe how your app performs and tweak as needed.
In short, Kubernetes autoscaling isn’t something you set once and forget. It’s a smart, dynamic system. But to get the most from it, you need to keep watching, testing, and fine-tuning along the way.
Fixing Common Kubernetes Autoscaling Issues:
If your autoscaler isn’t working, don’t worry. Here are a few common issues:
| Issue | Solution |
|---|---|
| Metrics not available | Make sure metrics-server is properly installed. |
| HPA not scaling | Double-check CPU requests/limits in your deployment. |
| Usage shows 0% | Try a stronger load generator like ab or hey. |
Still stuck? Logs and kubectl describe hpa can help you dig deeper.
Beyond This Kubernetes Autoscaling Example?
You’ve grasped the essentials — let’s move on to the next level.
So, what’s next? Let’s look at a few advanced options that can take your Kubernetes autoscaling to the next level.
- First, try KEDA (Kubernetes Event-Driven Autoscaling). It allows your workloads to scale based on external triggers—such as queue length, Kafka messages, or even custom events. This is perfect when CPU and memory just aren’t enough.
- Next, explore Custom Metrics Autoscaling. Instead of relying on default metrics like CPU, you can scale using memory usage, request counts, or any custom logic you define. This gives you much more flexibility.
- Then, take a look at the Vertical Pod Autoscaler (VPA). Unlike HPA, VPA automatically adjusts the CPU and memory requests of your pods based on actual usage over time. As a result, your apps stay efficient without manual tweaks.
Of course, these tools are more advanced—but don’t let that stop you. By exploring them one by one, you’ll gain deeper insights into how Kubernetes handles scaling under different conditions.
In the end, these features help you build faster, smarter, and more reliable systems. So why wait? Start experimenting, keep learning, and continue improving your Kubernetes skills.
Conclusion: Kubernetes Autoscaling Example
Now that you’ve reached the end, let’s take a moment to review what you’ve learned.
What You Did
Throughout this example, you:
- First, learned what autoscaling is and why it matters
- Then, set up a simple Nginx deployment in Kubernetes
- Next, created a Horizontal Pod Autoscaler (HPA) to manage scaling
- After that, simulated traffic to test how autoscaling works in real time
- Finally, cleaned up your environment and got ready for real-world use
Why It Matters
Clearly, autoscaling helps Kubernetes work smarter—not harder. Instead of adjusting resources manually, you let Kubernetes handle it for you. As a result, your apps stay responsive and efficient.
What to Do Next
Now that you’ve seen how it works, why stop here?
- Try scaling a different app
- Experiment with custom metrics
- Explore other types of autoscaling, like vertical or cluster autoscaling
- Apply what you’ve learned in real projects
Although this was a basic example, it gave you a strong foundation. So, don’t wait—keep building your Kubernetes skills.
Final Thoughts
To sum up, Kubernetes autoscaling is a powerful feature. It improves performance, saves resources, and reduces stress. The best part is, it lets you spend more time on meaningful tasks.
So go ahead—try it out, test more use cases, and keep exploring. You’re well on your way to mastering Kubernetes.
Click here to Read more about DevOps-Challenge && DevOps-Security
FAQs:
Do I really need a metrics-server for a Kubernetes Autoscaling Example to work?
Answer: Yes, you definitely do. If you’re planning to try a Kubernetes Autoscaling Example, having the metrics-server in your cluster is non-negotiable. Why? Because it collects real-time CPU and memory usage from your pods. Then, the Horizontal Pod Autoscaler uses that data to decide when to scale up or down. Without it, autoscaling simply won’t happen.
Can I use any container image in a Kubernetes Autoscaling Example?
Answer: In most cases, yes! You can use nearly any container image in a Kubernetes Autoscaling Example. However, there’s one important thing you shouldn’t skip—setting CPU and memory limits. These resource settings tell Kubernetes how much your app needs to run smoothly. More importantly, they give the autoscaler something to measure. Without them, Kubernetes can’t scale your app properly.
What actually triggers scaling in a Kubernetes Autoscaling Example?
Answer: In every Kubernetes Autoscaling Example, the autoscaler constantly watches your pod’s CPU or memory usage. When the usage goes above your defined threshold—say 60% CPU—it starts adding more pods to handle the extra traffic. On the other hand, when the load drops, it automatically reduces the number of pods to save resources.
Will a Kubernetes Autoscaling Example affect my apps availability?
Answer: Honestly, it shouldn’t—if you configure it correctly. A properly tuned Kubernetes Autoscaling Example is designed to keep your app running smoothly, even during traffic spikes. In fact, it often improves availability by ensuring your app always has enough pods to serve users. That said, don’t skip testing. Try it in a staging environment first. Also, pay attention to pod startup times and readiness checks.