

Content
- Introduction: Kubernetes Troubleshooting Cheat Sheet
- Why Kubernetes Troubleshooting Cheat Sheet Can Feel Complex
- Recognizing the Most Common Kubernetes Problems
- Breaking Down Node Issues(Kubernetes Troubleshooting Cheat Sheet):
- Debugging Pods Like a Pro(Kubernetes Troubleshooting Cheat Sheet)
- Tackling Kubernetes Networking Problems
- Solving Persistent Storage Mysteries
- Tools That Make Kubernetes Troubleshooting Cheat Sheet Simpler
- Conclusion: Kubernetes Troubleshooting Cheat Sheet
- FAQs:
Introduction: Kubernetes Troubleshooting Cheat Sheet
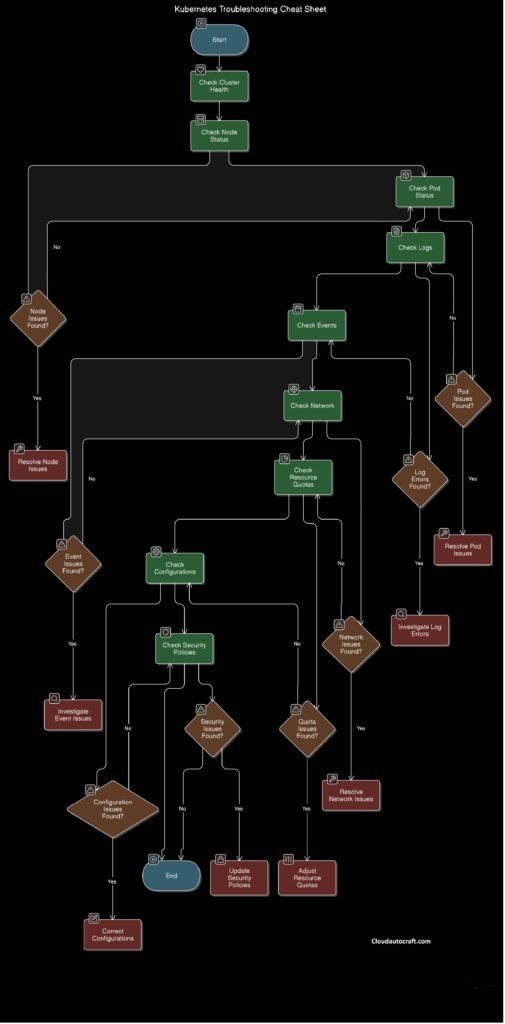
Kubernetes is fantastic for container orchestration, but when things break, it’s like being stuck in traffic with no GPS. That’s where a Kubernetes Troubleshooting Cheat Sheet becomes your lifeline. Troubleshooting isn’t just about solving problems; it’s about solving them fast while understanding what’s going wrong.
Whether you’re a beginner or a seasoned pro, this Kubernetes Troubleshooting Cheat Sheet will help you pinpoint issues in your Kubernetes environment, tackle them with confidence, and maintain cluster health without pulling your hair out. Let’s get started!
Why Kubernetes Troubleshooting Cheat Sheet Can Feel Complex
Kubernetes issues often stem from its inherent complexity. So, let’s simplify it. Imagine a typical Kubernetes cluster—it’s made up of nodes, pods, services, and external dependencies. Now, here’s the catch: when something goes wrong at any of these layers, your workload can come to a screeching halt.
Key Reasons Kubernetes Troubleshooting Cheat Sheet Feels Hard:
- Multiple Layers: Kubernetes is a distributed system, so problems can pop up anywhere—nodes, pods, network configurations, or even external APIs.
- Dynamic Environment: Eventually, pods and containers are transient by nature. Similarly, they come and go, making the process of tracking persistent issues feel like chasing a constantly moving target.
- Log Overload: With so many components generating logs, it can feel less like helpful breadcrumbs and more like drowning in a sea of data.
- Skill Gaps: And let’s admit it—debugging Kubernetes requires you to wear multiple hats: system admin, developer, and networking expert.
But here’s the good news: With the right mindset and approach, you can master Kubernetes troubleshooting and handle any issue like a pro. Let’s explore how!
Recognizing the Most Common Kubernetes Problems
Kubernetes has a way of dropping hints when things go sideways. The trick is spotting these early warning signs. Catching them in time can save you hours of frustration and troubleshooting down the line.
Common Problems and Symptoms of Kubernetes Troubleshooting Cheat Sheet:
Kubernetes issues often reveal themselves through clear signs. Therefore, let’s look at some of the most common ones you might come across:
Pods Stuck in Pending
- Symptoms: Ever encountered pods that refuse to start and remain in the Pending state indefinitely? Frustrating, right?
- Possible Cause: More often than not, this is due to resource constraints or unmet scheduling conditions. So, the next step is to check for any resource limitations or misconfigured schedules that might be causing the delay.
CrashLoopBackOff
- Symptoms: Your pods are crashing and restarting repeatedly, stuck in a never-ending cycle. Sound familiar?
- Possible Cause: This is usually due to application misconfigurations or missing dependencies.
Service Not Accessible
- Symptoms: When applications can’t talk to other services, it’s a clear red flag.
- Possible Cause: The culprit is often a misconfigured service or network policy causing the communication breakdown.
DNS Resolution Failing
- Symptoms: Hostnames won’t resolve, and external connections just fail to happen. Ever felt stuck in this situation?
- Possible Cause: It’s likely due to CoreDNS misconfigurations or network connectivity issues.
Now, identifying these symptoms is a great start—but here’s the fun part. So, Let’s roll up our sleeves and figure out how to tackle them head-on!
Breaking Down Node Issues(Kubernetes Troubleshooting Cheat Sheet):
Step-by-Step Fixes: Kubernetes Troubleshooting Cheat Sheet
Nodes form the backbone of your Kubernetes cluster. So, when a node faces issues, everything built on top of it starts to falter.
Step 1: Check Node Status
Run:
kubectl get nodes
First, look for nodes in NotReady or Unknown states. If you find any, it’s important to investigate further, as unhealthy nodes can prevent workloads from being scheduled properly. Consequently, this could lead to delays or failures in your cluster, so it’s a critical aspect to monitor for optimal performance.
Step 2: Examine Node Events
Use:
kubectl describe node <node-name>
From there, look for events such as disk pressure, memory constraints, or kubelet errors. These issues can indicate underlying problems that might prevent the node from functioning properly, so addressing them promptly can help restore node health.
Step 3: Inspect Resource Usage
If you suspect resource exhaustion, the next step is to check usage with the following command:
kubectl top node
This will show you the CPU and memory usage of your nodes. More often than not, nodes running out of CPU or memory are the main culprits behind issues, so keeping an eye on resource usage is essential for preventing such problems.
Step 4: Check Logs
Review kubelet logs:
journalctl -u kubelet
At this stage, this step can provide valuable insights, especially since the real clues often lie within these logs. As you carefully review them, make sure to keep an eye out for any errors or service failures related to the node. Furthermore, by identifying these issues early on, you can proactively address any underlying problems that might be affecting node health and workload scheduling. Ultimately, this approach ensures a more stable and efficient system.
Debugging Pods Like a Pro(Kubernetes Troubleshooting Cheat Sheet)
Pods are the heart of your Kubernetes applications. When they misbehave, it’s your applications that take the hit. But don’t worry—troubleshooting pods doesn’t have to be overwhelming. Let’s break it down step by step to get things back on track.
Step 1: Check Pod Events
Start with:
kubectl describe pod <pod-name>
Events can tell you if the issue is due to image pulls, failed scheduling, or resource requests.
Step 2: View Pod Logs
To understand what’s happening inside a pod, check its logs:
kubectl logs <pod-name>
If your pod contains multiple containers, don’t worry! In fact, you can easily narrow things down. To do so, simply add -c to your command. This way, you can focus on the specific container you’re troubleshooting. Moreover, this small tweak can save you a significant amount of time and help you pinpoint the issue much faster. As a result, you’ll ensure a more efficient debugging process!
Step 3: Debug Pod Internally
Sometimes, the best way to troubleshoot is by stepping inside the pod itself. Whether you need to inspect configurations or test commands, here’s how you can do it:
kubectl exec -it <pod-name> -- /bin/bash
Example: CrashLoopBackOff
When your pod gets stuck in a CrashLoopBackOff state, don’t panic—logs are your best friend here. Start by checking the logs to uncover what’s going wrong. For example, if you spot an error like command not found, it’s a good indicator that the container’s entrypoint might be misconfigured. So, what’s next? Simply update the container’s command in the deployment YAML file, and then redeploy your application. With this small tweak, you’ll be back on track in no time!
Tackling Kubernetes Networking Problems
Networking problems in Kubernetes can feel like untangling a web—they often span multiple layers. But don’t worry, tackling them step by step makes the process manageable. Let’s dive into how you can troubleshoot effectively.
Step 1: Check Services
List all services:
kubectl get svc
To start off, make sure your service configurations are spot-on. Check things like ports and ClusterIP—even a small mistake here can throw everything off. So, take a moment to verify these settings carefully before moving on.
Step 2: Test Connectivity
To use curl from one pod to another, simply run the following command:
kubectl exec <pod-name> -- curl <service-name>
However, if the command fails, don’t worry! The issue might be related to network policies. In that case, it’s a good idea to check and review your network policies to ensure communication is allowed between the pods.
Step 3: Inspect CoreDNS
DNS plays a crucial role in Kubernetes, so when things go wrong, it’s essential to check the logs. To do this, run the following command to inspect the CoreDNS logs:
kubectl logs -n kube-system coredns
If you happen to come across any errors in these logs, they are likely the reason why hostnames aren’t resolving. As a result, this step can quickly guide you toward identifying the root cause. Furthermore, it allows you to troubleshoot the issue more efficiently and effectively.
Solving Persistent Storage Mysteries
Storage issues can be particularly frustrating, especially when you’re dealing with stateful applications. But don’t worry, handling them step by step can make all the difference. Therefore, Let’s walk through how you can tackle storage problems in Kubernetes.
Step 1: Inspect Persistent Volume Claims (PVCs)
Run:
kubectl get pvc
When you notice PVCs stuck in the Pending state, the first thing to check is the StorageClass or a potential resource issue. Typically, this means either the StorageClass isn’t properly configured or there aren’t enough resources available. So, start by verifying both—this will often clear up the issue and restore your storage setup.
Step 2: Check Events
To better understand why a PVC is stuck, the next step is to describe it for more detailed information. Specifically, you can run the following command:
bashCopy codekubectl describe pvc <pvc-name>
This will give you a thorough breakdown of the PVC. Moreover, it will allow you to identify any underlying issues that could be preventing it from being bound. By doing so, you can more easily pinpoint and address the problem.
Step 3: Verify Access Modes
Make sure the PVC access mode matches the workload. For example, ReadWriteOnce won’t work for multiple pods.
Tools That Make Kubernetes Troubleshooting Cheat Sheet Simpler
Using the correct tools which can save you tons of time. Here are a few favourites:
| Tool | Purpose |
|---|---|
| Lens | Provides a visual dashboard for your cluster. |
| K9s | Terminal-based UI to interact with Kubernetes easily. |
| Prometheus | Monitors metrics and alerts you about issues. |
| kubectl-debug | Enables debugging directly within pods. |
Conclusion: Kubernetes Troubleshooting Cheat Sheet
Kubernetes troubleshooting doesn’t have to be a headache. Moreover, With this cheat sheet in hand, you now have the tools and knowledge to tackle any issue systematically. Whether it’s node-level diagnostics, pod debugging, network fixes, or storage solutions, you’re now much better equipped to keep your cluster running smoothly.
Therefore, keep this guide handy the next time you face a Kubernetes challenge. Additionally, remember that every problem you solve brings you one step closer to Kubernetes mastery. Finally, you’ve got this—so go ahead and conquer!
Click here for more insights on various DevOps-Challenge || DevOps-Security topics.
FAQs:
What do I do when a pod is stuck in Pending?
Answer: First and foremost, check the node availability by running kubectl get nodes. This will give you a clear picture of your cluster’s resources. Then, ensure that the resource requests specified in your pod’s YAML file align with the resources available on your nodes. If there’s a mismatch, the pod won’t be able to schedule correctly, and that could be why it’s stuck.
How can I troubleshoot CrashLoopBackOff errors?
Answer: Start by inspecting the logs using kubectl logs—this will help you identify the root cause of the crash. From there, you can determine whether the issue is due to misconfigurations in the container image or a problematic startup script. Once you’ve identified the issue, fix the misconfigurations, and then redeploy the pod to see if the issue resolves.
Why isn’t my service accessible?
Answer: To begin troubleshooting, verify that the service’s ClusterIP and port configuration are correct. This is a crucial step because an incorrect configuration can block access. So, If those configurations are fine, next check the network policies. Sometimes, network policies can inadvertently block traffic between services, so it’s worth ensuring they’re set up properly.
How do I debug DNS issues?
Answer: To investigate DNS problems, start by checking the CoreDNS logs with kubectl logs -n kube-system coredns. These logs will often point to any underlying issues. Afterward, double-check your DNS configuration within the cluster, as even minor errors can prevent hostnames from resolving properly.
Originally posted 2025-01-14 12:44:46.